How to Choose the Best Carbide End Mills?
Choosing the best carbide end mills is not a simple catalog exercise. The right tool must match the material, machine, holder, cutting depth, and production goal. A cutter that performs beautifully in aluminum may fail quickly in hardened steel. Even a premium coating cannot correct poor workholding or excessive tool overhang.
Dr. Tony L. Schmitz, a respected machining researcher and educator, emphasizes a practical principle: “Machining is a process, not merely a cutting operation.” That idea matters when comparing carbide end mills. Tool geometry, helix angle, flute count, carbide grade, and coating should support the complete process. A four-flute end mill may provide strong chip control in steel, while a polished two-flute design can clear aluminum chips more effectively. Small details matter.
This guide examines those choices through real machining conditions. It considers surface finish, tool life, material removal rate, rigidity, and total cost. Manufacturer recommendations provide a valuable starting point, but they are not a guarantee. Your machine may vibrate. Your coolant may behave differently. Your first test may fail.
That is normal.
Reliable selection requires measured experiments. Check chips, listen for chatter, inspect the cutting edge, and record tool wear. Sometimes the fastest-looking option is not the most economical. A slightly lower speed may produce a cleaner wall and extend tool life. The goal is not simply buying carbide end mills. It is building a stable, repeatable cutting process.
Define the Cutting Task and Material Requirements
Choosing the best carbide end mill begins with the cutting task, not the tool catalog.
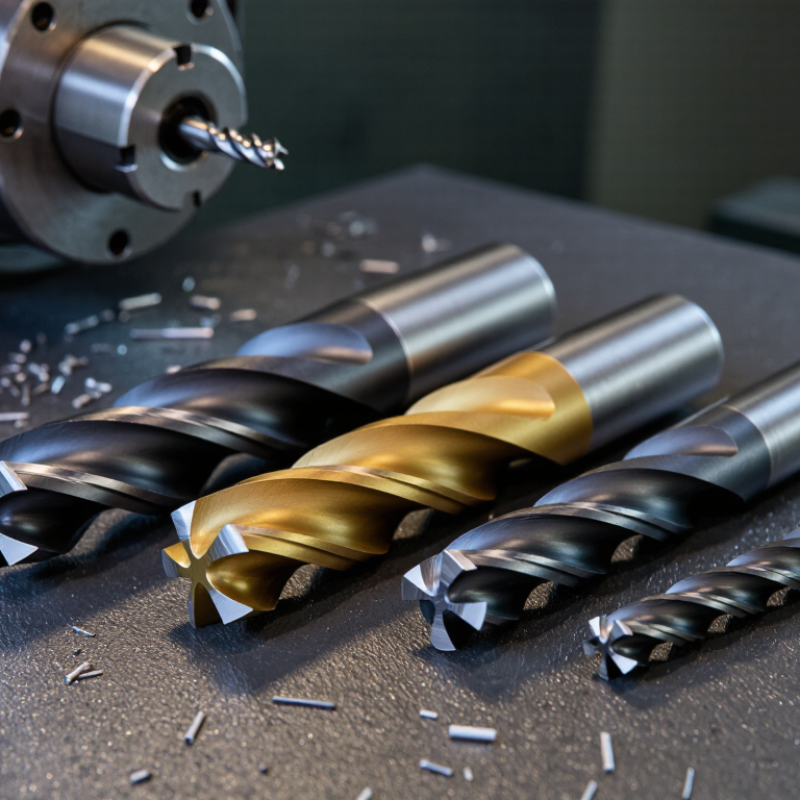
Write down the operation: slotting, profiling, plunging, or finishing. A full-width slot loads every flute heavily. A shallow side cut behaves differently. It sounds basic. Yet many tool failures start here. Record the workpiece shape, wall thickness, corner radius, and required surface finish. These details determine flute count, helix angle, diameter, and reach.
Material requirements deserve equal attention.
Aluminum usually rewards sharp edges, polished flutes, and generous chip space. Stainless steel needs controlled heat, strong edges, and steady chip evacuation. Hardened steel may require a wear-resistant coating and reduced radial engagement. Cast iron produces abrasive dust, so rigid setups and suitable edge protection matter. For titanium, reduce heat concentration and avoid rubbing at the tool shoulder. Always check hardness, abrasiveness, and thermal behavior before selecting geometry. A material name alone is not enough.
In practice, I compare recommended cutting data with the machine’s rigidity and spindle power.
A long reach on a light machine can chatter, even with premium carbide. Use the shortest practical tool. Secure clamping matters. Watch the first chips: blue chips may indicate excessive heat, while powder can signal rubbing or poor engagement. Measure the finished wall and inspect the edge after a short test cut. I have learned that published parameters are starting points, not guarantees.
Match Carbide Grade and Coating to the Workpiece
How to Choose the Best Carbide End Mills?
Matching carbide grade and coating to the workpiece prevents premature wear and unstable cutting. The best choice depends on hardness, toughness, heat, and chip control. A finer-grain carbide usually offers stronger wear resistance in hardened steel. A tougher grade with more binder can better tolerate interrupted cuts and vibration. It may wear faster, though.
For hardened steel, a heat-resistant coating can protect the cutting edge during dry or high-temperature machining. Stainless steel needs a sharp edge, reliable chip evacuation, and a coating that limits built-up edge. Aluminum often performs better with a polished, uncoated flute or a low-friction coating. Keep the flute surface smooth. Sticky chips can quickly damage the edge. Titanium alloys require careful heat control, so avoid rubbing and use conservative engagement.
In the shop, I check the workpiece hardness before selecting the cutter. I also review coolant access, machine rigidity, and the programmed radial depth. A coating suited to steel may perform poorly in aluminum. That mistake is easy to make. I once blamed the carbide grade for rapid wear, but excessive tool engagement was the real cause. Trial cuts on scrap material can reveal edge chipping, built-up material, or excessive heat. Inspect the edge after each test, then adjust speed, feed, or coating selection rather than changing everything at once.
Select the Right End Mill Geometry and Flute Design
Choosing a carbide end mill starts with geometry, not diameter alone. Grand View Research’s 2024 cutting-tools report estimates the global market will grow steadily through 2030. That growth reflects demand for faster, more predictable machining. Geometry controls whether a tool survives that demand.
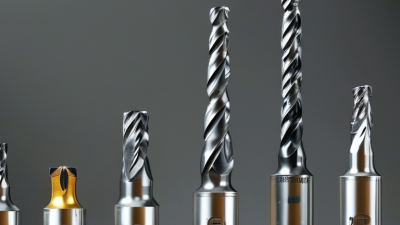
Match the flute count to chip volume and material. Two flutes leave wide channels for aluminum chips. Three or four flutes provide better rigidity for steel and general slotting. Five or more flutes suit high-speed side milling, where radial engagement stays low. Watch the helix angle. A 35-degree helix offers balanced lifting and strength. A higher helix can improve finish, but it may pull thin parts upward.
Small details matter. Variable pitch reduces harmonic chatter. A stronger core supports deep cuts, though it reduces chip space. Unequal flute spacing can leave a cleaner wall beside a thin web. Industry reports often emphasize productivity, but productivity is not simply higher spindle speed. A tool that cuts quietly at 8,000 rpm may outperform a faster tool that chatters at 12,000 rpm. I have seen geometry choices fail because operators copied catalog recommendations without checking workholding. That mistake is easy to repeat. Test one variable at a time, record wear, and inspect the chip shape after the first pass.
How to Choose the Best Carbide End Mills?
Select the right end mill geometry and flute design by matching the typical helix angle to the workpiece material.
The ranges shown are common starting points: higher helix angles generally improve shearing and chip evacuation in softer materials such as aluminum, while lower helix angles can provide stronger cutting edges for hardened materials. Final selection should also consider tool diameter, rigidity, axial depth of cut, and machining parameters.
Choose Dimensions, Cutting Parameters, and Tool Capacity
How to Choose the Best Carbide End Mills?
Choosing a carbide end mill begins with the workpiece, machine, and tool dimensions. Match the cutter diameter to the pocket width and required corner radius. A smaller diameter reaches narrow areas, but it may deflect under heavy cutting. A larger diameter usually offers better rigidity and material removal. Check the flute length and overall reach carefully. Excessive stick-out can create vibration, even with a strong carbide tool.
Tips: Start with the cutting chart for your material. Adjust spindle speed, feed rate, axial depth, and radial engagement together. For steel, listen for a sharp cutting sound and inspect the chips. Powdery chips may indicate rubbing. Long, blue chips can suggest excessive heat. Use coolant or air when chip evacuation becomes difficult. Do not ignore the machine’s tool capacity.
Tool capacity includes spindle power, holder condition, maximum speed, and available clearance. A small machine may not support a large cutter at its recommended load. Reduce radial engagement when power is limited. Increase feed only when chip formation remains stable. I have seen carefully calculated settings fail because the holder was worn. That detail is easy to miss. Run a short test cut, measure the result, and refine the parameters before full production. Surface finish, tool wear, and dimensional accuracy should guide the next adjustment.
Compare Tool Quality, Cost, and Expected Service Life
How to Choose the Best Carbide End Mills?
The lowest price rarely means the lowest machining cost.
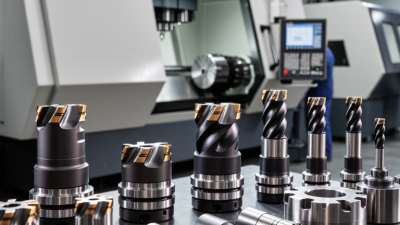
Compare carbide quality, edge preparation, coating, and dimensional consistency before purchasing. A reliable end mill should hold its diameter, resist chipping, and produce stable surfaces during repeated cuts. Check the tool’s runout as well. Even a high-quality cutter can fail early when the holder or spindle is poorly aligned.
Expected service life matters more than the initial invoice. Track tool life by parts produced, cutting time, and surface quality. Then calculate cost per finished part, not cost per tool. In shop trials, a slightly more expensive end mill may last twice as long under the same load. However, tool life is never guaranteed. Workpiece hardness, radial engagement, coolant, machine rigidity, and cutting speed can change the result. I once blamed the cutter for rapid wear, but excessive chip load was the real problem. That mistake was costly, yet useful.
Tips:
Request test data when available, but verify it on your own machine. Start with conservative cutting parameters. Inspect the cutting edges under magnification after each trial. Watch for flank wear, corner breakdown, chatter marks, and unusual heat. Keep a simple log. A short record often reveals patterns that memory misses. Avoid choosing solely by coating color or catalog claims. The best tool is the one that delivers consistent parts at a predictable cost.