Choosing Lead Stained Glass Windows is about more than selecting colors or a decorative pattern. The right design should suit the building, the room’s light, and the way people use the space. A narrow hallway may benefit from clear glass and restrained color. A sunny kitchen can handle richer tones, though strong afternoon light may change their appearance. Look closely at the window’s scale, frame, glass texture, and lead lines. Small samples help, but they cannot fully reproduce daylight. That limitation matters.
Louis Comfort Tiffany, a leading American glass designer, wrote, “I have always striven to fix beauty in wood, stone, glass or pottery, in oil or watercolor, by using whatever seemed fittest for the idea.” His words offer a useful principle: choose materials and design for the setting, not just for a photograph. For a leaded window, ask how each glass piece will look from inside and outside, and whether the pattern complements nearby woodwork or stone. Check the maker’s experience, installation approach, and care guidance. Ask for project photographs in similar lighting. Details count.
No choice is perfect. A vivid design may feel darker than expected on a cloudy day, while a subtle one may disappear at night. This guide explains how to compare craftsmanship, glass, patterns, privacy, and practical requirements before committing. It also considers where expert advice can prevent costly revisions. Bring measurements, reference images, and honest questions. A thoughtful choice should feel beautiful—and still make sense years later.
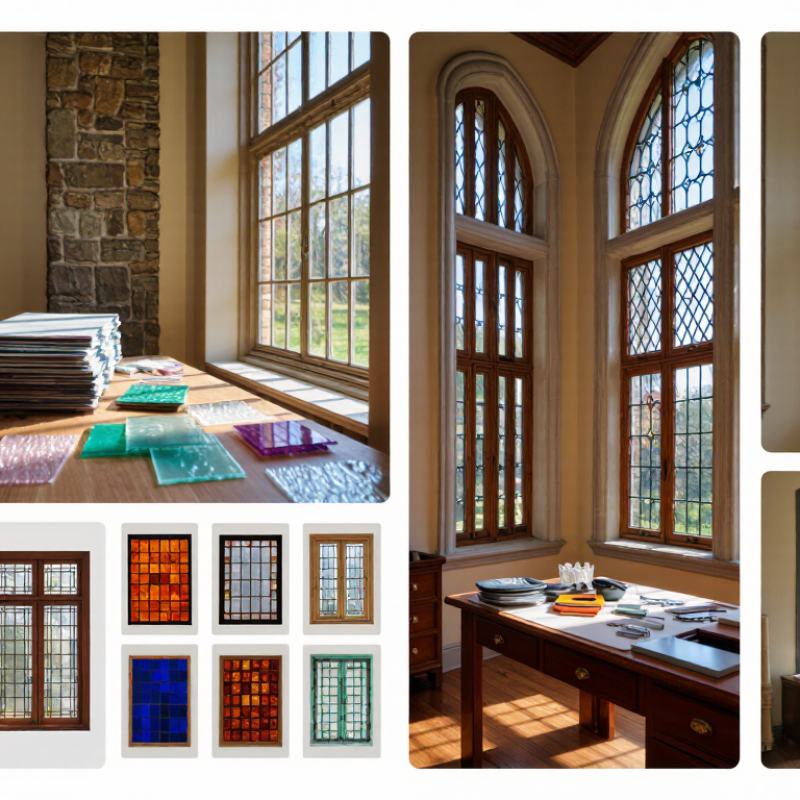
Before choosing a pattern, decide what the window needs to do. Is it meant to soften daylight, provide privacy, or become the room’s focal point? A bathroom window may need dense, textured glass that obscures faces while still admitting light. A stairwell might benefit from clearer sections that keep the space bright. For a front door, consider whether visitors can see inside when the room is lit at night. Small details matter.
Study the opening at different times of day. A north-facing window often receives cooler, steadier light, while strong direct sun can make vivid colors look intense and warm nearby surfaces. Notice what the window faces, too: a close neighboring wall may call for more privacy than a garden view. Measure the opening and check how the existing frame is supported before settling on a heavy design.
A qualified stained-glass professional can assess the glazing, ventilation, and installation needs on site. It is easy to choose a beautiful sample and forget the room around it. I have seen that choice feel too dark once installed. Think about maintenance as well, especially in damp or frequently opened windows.
Choose the glass style for the room’s actual light, not just a small sample viewed indoors. Clear, lightly textured glass keeps a hallway bright; opalescent pieces soften glare but can make a small window feel heavier. Hold samples against daylight at morning and afternoon. Test it at noon. Look for bubbles, streaks, and color shifts before settling on a style. A tiny sample can mislead.
Build a palette around the room’s fixed colors: the wood trim, wall paint, and nearby stone. Two or three main hues usually create a calmer effect than many competing colors. Then consider the lead pattern. Narrow came lines can make a compact panel feel delicate, while broad geometric divisions add visual weight. Sketch the pattern at full size; proportions often look different on paper. The U.S. Department of Energy’s Energy Saver guidance estimates that windows account for about 25–30% of residential heating and cooling energy use. Treat stained glass as a design choice, not an energy upgrade. For an insulated assembly, ask for whole-window performance figures, including U-factor and visible transmittance; the National Fenestration Rating Council defines these measures for rated products. One detail is easy to overlook: a rich red may glow beautifully at sunset but appear muddy on a north-facing wall. Check it in place, and be willing to revise the palette.
| Glass style | Color palette | Lead pattern | Light and privacy | A good fit when… |
|---|---|---|---|---|
| Cathedral glass Transparent glass with an even, gently textured appearance. | Clear or a restrained mix of blue, green, amber, and red. | Geometric grids, diamonds, borders, or simple botanical outlines. | Usually allows a clear view through transparent pieces; colored glass changes the quality of incoming light. | You want a bright window with crisp, readable shapes and relatively open sightlines. |
| Opalescent glass Milky or mottled glass with varying degrees of translucency. | Cream, pale pink, soft green, lavender, or blended tones. | Curving floral lines or broader shapes that follow the glass’s color variation. | Diffuses light and obscures details more than clear transparent glass; opacity varies by piece. | You prefer a soft, painterly effect or want more visual screening without a solid covering. |
| Antique-style glass Often has subtle surface irregularities and variation in thickness or texture. | Muted jewel tones, warm amber, pale green, smoky blue, or clear. | Traditional floral motifs, small medallions, or fine geometric divisions. | Texture can soften views and scatter light; the amount depends on the specific glass and design. | You want visual variation and a traditional handcrafted appearance. |
| Textured clear glass Clear glass with a patterned surface, such as rippled or hammered texture. | Mostly clear, optionally accented with a few colored pieces. | Simple borders, repeated panels, or restrained geometric patterns. | Keeps the window comparatively bright while surface texture can blur details; privacy depends on texture and viewing distance. | You want light and privacy with a subtle design rather than a strongly colored window. |
| Beveled clear glass Clear pieces with angled edges that refract light. | Primarily clear, sometimes paired with a small number of colored accents. | Symmetrical borders, diamonds, or focused center motifs that highlight the beveled pieces. | Generally admits substantial light; angled edges can create shifting highlights as light changes. | You want sparkle and a formal look without using a large area of saturated color. |
| Selection tip: View glass samples in the window’s actual daylight conditions. Glass color, texture, and transparency can look different depending on the light behind it. Choose a lead pattern that supports the design and suits the window’s proportions; for existing or large windows, have the structure assessed by a qualified stained-glass professional. | ||||
Measure the opening in at least three places: top, middle, and bottom. Repeat for height, then compare the two diagonals. A difference between diagonals can reveal a racked frame, not just a measuring mistake. Check the depth, too. Leaded stained glass needs room for its came, perimeter frame, glazing materials, and installation clearance. Old masonry is rarely perfectly square. One measurement is not enough.
Weight affects the support plan. National Glass Association glazing reference data use approximately 2.5 kg per square metre per millimetre of ordinary glass thickness. That puts a 6 mm sheet near 15 kg per square metre, before adding lead came, reinforcing bars, and the frame. A decorative panel may therefore weigh more than its appearance suggests. Record the proposed panel’s full assembly weight, then inspect the sill, lintel, and surrounding masonry for cracks, loose mortar, or movement. Small warning signs matter.
Also consider wind pressure and how the load transfers into the wall. ASTM E1300 provides a recognized method for evaluating glass under specified loads, but leaded assemblies may need specialist review beyond a simple glass calculation. Ask a qualified glazier or structural professional to assess the opening and fixing details. I would remeasure after removing old trim; it can conceal a shallow, uneven rebate. That extra check is easy to skip.
Measure the Opening and Assess Structural Requirements
Sample survey measurements show why an opening should be checked at several points: the width varies by 7 mm and the height by 8 mm. Confirm the final panel size and installation clearance with the installer. Separately inspect the lintel, jambs, and sill for sound, stable support; these measurements alone do not establish structural suitability.
When comparing lead stained glass windows, inspect the details up close. Look closely. Solder joints should appear secure, and the glass pieces should sit firmly within the lead came. Ask how the panel is reinforced, especially if it is large or will face frequent vibration. Uneven lines can be part of a handmade design, but loose glass or open joints deserve attention. Small details matter.
Safety depends on more than the panel itself. Consider where it will be installed, how it will be supported, and whether protective glazing is appropriate. Protective glazing can reduce impact risk, but poor ventilation may trap condensation against the artwork. Get the opening and mounting assessed by an experienced installer. During repairs or removal, disturbing old materials can create lead dust; use a qualified professional rather than attempting the work yourself.
Maintenance needs vary with exposure and construction. Check periodically for cracks, bowed sections, loose putty, or moisture between the panel and nearby glazing. Clean gently with a soft, damp cloth and mild soap, then dry the surface. Avoid abrasive pads and harsh cleaners. I would not assume a window is sound just because it looks bright from across the room; close inspection may reveal small shifts that need timely repair.
A leaded stained glass window is both artwork and a building component, so set a budget before discussing patterns. Include design time, glass selection, lead came, fabrication, installation, and any protective glazing. Ask for an itemized estimate and a written description of what is included. Keep a contingency for surprises, especially in older openings where frames may be uneven. A low quote can leave important work unclear.
Choose a maker who can show comparable projects and explain how they handle fitting, support, and repairs. Ask to see close-up photographs of solder joints and finished edges, not only distant room shots. Request references, a sample or design drawing, a timeline, and care instructions. The National Park Service’s Preservation Brief 33, The Preservation and Repair of Historic Stained and Leaded Glass, stresses assessing the glass and its supporting system before repair. That is useful guidance for new work, too: installation details matter.
Think about comfort as well as appearance. The U.S. Department of Energy estimates that windows account for 25–30% of residential heating and cooling energy use. Leaded glass alone may not provide the insulation of a modern window assembly, so discuss suitable glazing and ventilation with a qualified installer. Ask for the trade-offs in writing. I would not assume the most elaborate design is the best value; sometimes a simpler panel fits the room better, though that judgment can be wrong.
Contact
KYOCERA SGS Precision Tools, Inc.
(330) 686-5700
150 Marc Drive
Cuyahoga Falls, OH 44223
Products
Resources